
Varnished Wood with V-Ray 5

Welcome to another article!
Hi again. As you know, 2020 was a very strange year for everyone. I've just noticed that I hadn't share any article in the whole year! But thank god we're safe and here we are again. I hope you're and your family are safe too and remember... #StayHome
This time I will start with a kind of **Warning**:
-If you are a lover of extreme detail, a meticulous person who care about the slightest touch of realism in each material, reflection, bump, etc. then I am sure you will love this tutorial, otherwise you may think that everything that will be shown here is not even noticeable and you won't see the reason of all of the effort.
This time I'll show you how to create Varnished Wood material with the new "Coat" option of the VRayMtl in V-Ray 5.
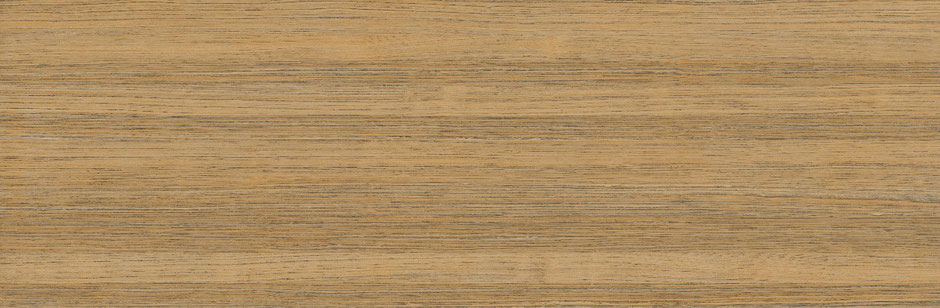
I'm sure you have seen certain types of varnished wood which have a very particular reflection color and glossiness. I'm talking about those who have some goldish/yellowish tones under the coat of varnish.
Here are some examples, please pay attention to those I call "Internal Reflections" because that's the effect I am talking about:


Try to find those reflections in the next examples:


Now that you have found them we are on the same boat! So let's begin.
Scene
Software used: 3ds Max 2021 + Vray 5 Hotfix 2.
Note: I used Vray GPU but it's exactly the same with Vray CPU.
Geometry: 1 plane with Floor Generator and 1 teapot.
Lighting: 1 Dome Light with HDRI + 3 Vray Lights:

This is how it looks with a base material:

base wood
DIFFUSE
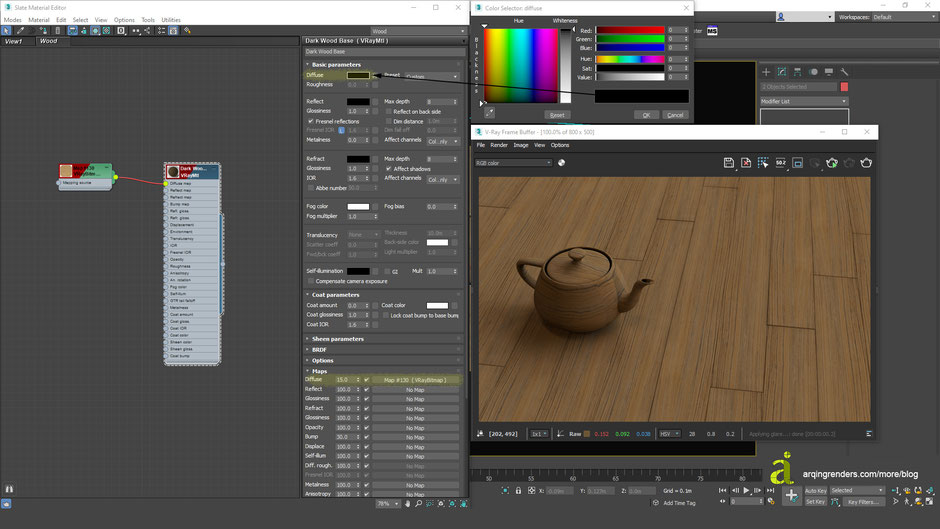
Let's start by applying a diffuse map. I'll use a single wood texture file loaded as VrayBitmap (former VrayHDRI map):
I want to make a dark wood so I'll put an absolute black color in the Diffuse box and a value of 3 in the Diffuse Map (although in the next image you'll see I wrote 15, I did that so you can see better the texture in the preview, we'll change that later back to 3) , this way it looks darker than the original texture. Feel free to adjust this to your liking.
Now we are going to add some Randomness from the only texture we are using. I do this when I don't find good textures with many variations included. I would like to share with you this tip I use to get many variations from a single file.
In order to do this, we'll crop the texture into small regions using the Crop/Place option, then we must move the region to a place where it's not equal to any other.
So let's create 4 different regions (you can make more if you want more variations). Note that I made the regions very rectangular because I'll use them as wooden planks:

We will connect the 4 variations in a VrayMultiSubTex map and we'll use Random by Element because this way the variations will apply randomly to every plank created with Floor Generator. Then I recommend to play with the values of Random Hue, Sat and Gamma, so you can get more color and tone variations to each plank. You always can change the overall randomness with the "Seed" value until you get the variation mix you want.

Let's add MORE RANDOMNESS! :)
For that we'll use a map called VRayUVWRandomizer. You can find it will only in V-Ray 5, earlier versions don't have it.
This shader is MAGICAL! If you don't know how to use it keep reading and enjoy this amazing new tool.
This tool is located in: Maps> V-Ray> VRayUVWRandomizer. It works as a "Mapping Source" for the VrayBitmap, it's like a common 3dsMax Controller but only for Vray stuff. It has a lot of features to add randomness to bitmaps.

Randomize: By Element. Because the Floor Generator makes a lot of element IDs, so this will work fine.
Seed: You can change this value until you have the variations you like.
Stochastic Tiling: this one is CRAZY! It makes a Seamless texture with the ease of just 1 click!
U and V Offset: You can offset the texture on the surface applied, so even if the same ID is assigned to different elements, it'll look different.
UV Orientation: This value rotates the texture randomly.
U and V Scale: This value scales the texture randomly, so in some elements will look bigger/smaller even if it's the same ID.
Here you can compare the variations we got so far:


You can learn more about VrayUVWRandomizer HERE.
REFLECT
Before adding reflections, remember to change back to 3 the amount of the Diffuse Map, so it should look like this:

As you remember, in the beginning we saw that the reflections usually look between goldish and yellowish tones, and we want them to look stronger on certain angles, so we will use a Falloff map to replicate that effect.
These are the colors I used for the Front and Side and also check the curvature I made in the Mix Curve:

Since we are only using 1 wood texture file, we'll change it to black & white with a Color Correction map and play with the Brightness and Contrast to enhance the wood veins and get a nice map for the Reflection, Glossiness and Bump later.
Remember that we want to keep our goldish reflection tones, so we'll use our black & white map only as a Mask for the Falloff previously created. Procedural Mask map is located in: Maps> General> Mask.
Now it looks like this:

GLOSSINESS
Now we step forward to Glossy reflections. We will re-use the Color Correction map we made before because it has information about which parts reflect and which not, properly contained in black and white values (black= 0%: White=100%), and that's how Glossiness map work. We will give it a little adjustment to remove some contrast to make it look more matte. Remember we are creating the base wood yet, not the glossy varnish coat.
Connect the existing Color Correction to a new Color Correction map and play with the Contrast until you get some nice looking matte reflections:

Finally, change the glossiness to 0.9 and then go to BRDF label and change the GTR tail falloff to 1.6 to make it look even more matte.

BUMP
Now let's add a subtle bump to our base wood. I want to see the natural veins of the wood, so once again we will re-use the first Color Correction map we made and then we'll connect it a VRayColor2Bump. This map reads the input info and converts it to a nice bumpy surface. It is located at: Maps> V-Ray> VRayColor2Bump.
After connecting it I will leave the default values of the VRayColor2Bump and will change the strength directly in the Maps label.
I will use a value of 2 to make it very subtle, maybe you won't notice the change now, but if you zoom in, you'll see it. Also you'll see that I'm using a Negative value (-2) because I liked more how the veins look with this inverse bump.

Now our Dark Wood Base is Done!
Let's go with the Coat of glossy Varnish.
COAT
This part is very exciting because in previous versions of V-Ray, we had to use a Blend Material in order to add a coat of another material and usually it takes more time to render and needs a couple tricks to mix the bump maps of both layers to make them look unified.
But with V-Ray 5 to reach this effect is very easy and fast because they added a COAT PARAMETERS label within the VrayMtl.
Go to the Coat Parameters label and write a small value in the Coat Amount otherwise it'll look very strong and the base material will be lost, I'll put 0.08. I will change too the Coat Glossiness to 0.9 (I never use 1.0 because it is not realistic at all).

Here's a comparison:


COAT GLOSSINESS
We also can tweak the Coat's glossiness using black & white maps as we usually do with any other material.
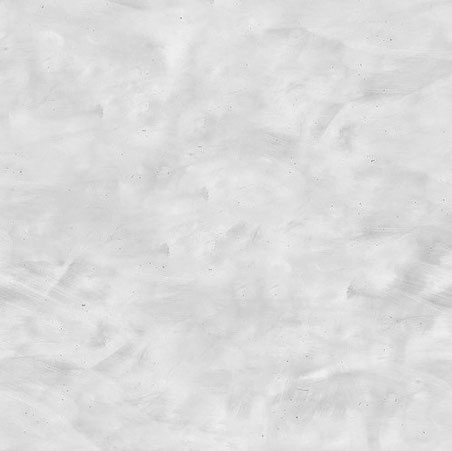
I will use the following map which I like because it has some finger prints and different kind of dirt marks:
Before linking it to the material, I will use a VrayTriplanarTex to give it some overall dimensions. In this case I will use a value of 0.5 meters for this dirt texture. You can locate it at: Maps> V-Ray> VrayTriplanarTex.
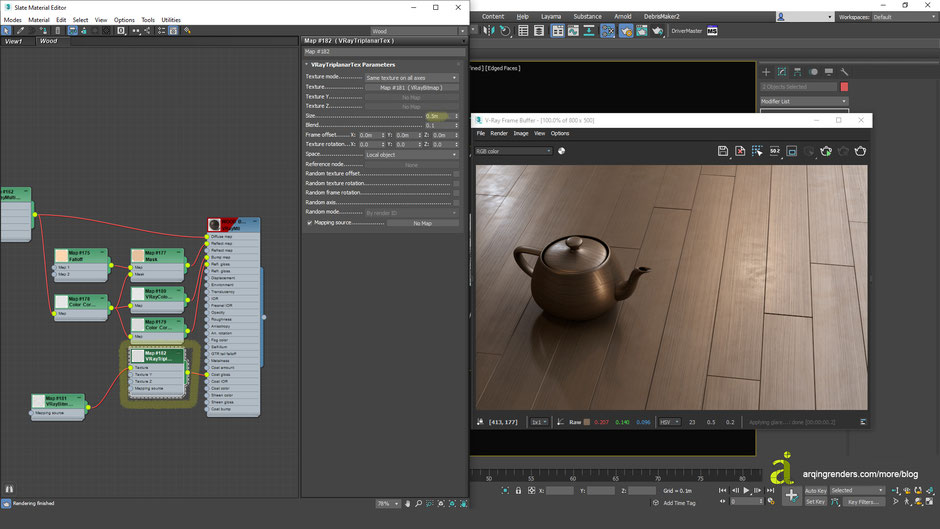
Now just tweak the glossiness amount to you liking. I will leave it at 75:

COAT BUMP
As I mentioned before, this is a very great tool because we can add a bump to the coat and the material will keep considering as a separate map the bump added to the base material (in this case, the wood veins).
For this material I will apply this texture of some small hit marks:

Once again I will give it some dimensions with a VrayTriplanarTex, now I will use 0.3 meters and I will also use a negative value because if you see my map, the white dots will work as external relief marks and I want them to look like little bumps inward.

MORE RANDOMNESS
Do you remember the VRayUVWRandomizer? Well.. It's time to use it again to add randomness to the stain maps to avoid tiling patterns when they repeat in the multiple wooden planks. Just create it and connect it to both maps.
Please note that I'm using different values than before:

MORE DETAILS
Why not?
I decided to add extra small chamfers using the VrayBumpMtl. This material only adds an extra bump over all the bumps contained in the main material. It is located at: Materials> V-Ray> VrayBumpMtl.
Add the VrayBumpMtl and connect the base material, then add a VrayEdgesTex as a bump. Set the "World width" to 0.001m.
It is located at: Maps> V-Ray> VrayEdgesTex.
Now select all the objects that have the Base Wood and apply our new VrayBumpMtl.
It should look like this:

FINAL MATERIAL
Here's the final result. You can compare them here:
LEFT: No internal reflections RIGHT: Internal Reflections under coat


Watch them in higher resolution:


I hope you like this tutorial!
Thanks for Watching!
Mario Cameras
If you liked it.. don't forget to share it, it may help someone out there :)
Write a comment